English
 عربي
عربي 
Consistent dry lamination quality depends far more on routine maintenance than on any single machine parameter. The coating unit, drying oven, and pressing unit each have specific cleaning intervals, parameter tolerances, and wear indicators that operators should monitor. This guide covers practical maintenance procedures for all three units, with checklists and troubleshooting references you can apply on the production floor.
Why the Three Core Units Deserve Separate Maintenance Plans
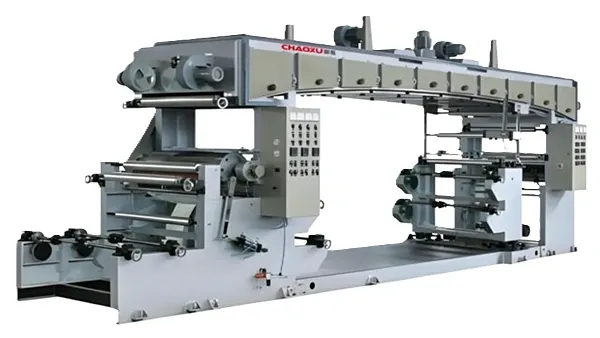
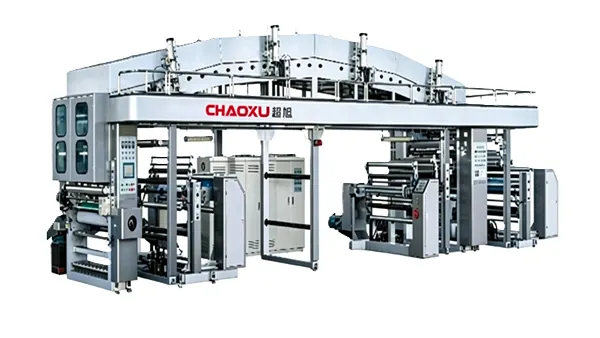
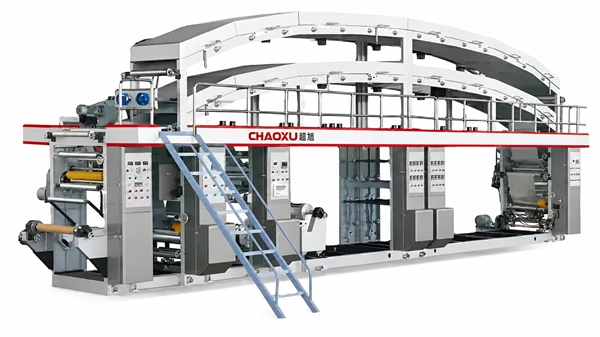
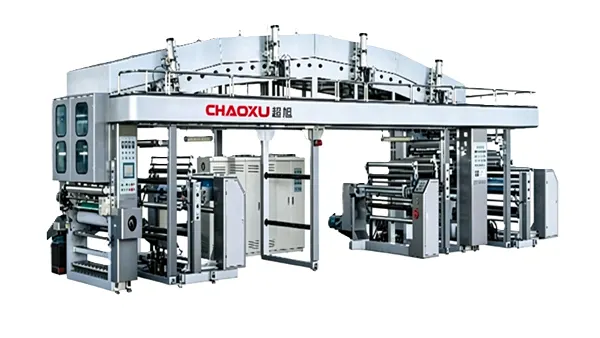
A dry laminating machine performs three sequential functions: adhesive application onto the primary substrate, solvent removal in the drying oven, and permanent bonding under heat and pressure in the pressing unit. Each function imposes different wear patterns and failure modes.
The coating unit handles wet adhesive and solvent daily, so contamination and anilox roller wear dominate. The drying oven operates at elevated temperatures and accumulates adhesive residue and solvent vapor, making airflow and temperature uniformity critical. The pressing unit applies consistent pressure at controlled temperature, where roller surface condition and nip pressure balance determine bond quality.
Treating these three units as a single maintenance category often leads to under-servicing the coating unit (because it is cleaned more frequently) and over-servicing the pressing unit (because it looks clean). A unit-specific schedule solves this.
Coating Unit Maintenance: Cleaning, Viscosity, and Roller Care
The coating unit applies adhesive via an anilox roller or smooth roller system. Its maintenance priorities are contamination prevention, coating weight consistency, and roller surface integrity.
Daily cleaning after each production shift
Solvent-based adhesives cure over time. Once cured inside anilox cells or on roller surfaces, they are difficult to remove without abrasive methods that damage the roller. After every shift, flush the adhesive circulation system with clean ethyl acetate or the recommended solvent until the discharged liquid runs clear—typically at least five minutes of circulation. Remove the doctor blade and clean it with a copper brush and solvent. Wipe the anilox roller with a dedicated cleaning agent, paying attention to cell openings where residual curing agent can crystallize.
Coating weight and viscosity control
Coating weight determines bond strength and final package performance. Too thick a coating wastes adhesive and may leave excess solvent residue; too thin a coating risks delamination. For solvent-based systems, the adhesive working concentration should be adjusted within the coating roller's capability—a finer anilox delivers lower coating weight and requires a lower working concentration, while a coarser roller delivers higher coating weight and can run at higher concentration.
Viscosity should be checked with a Zahn cup (No. 3) at the start of each shift. For dry lamination, a viscosity range of 10 to 20 seconds at 25°C is commonly referenced for solvent-based adhesives, though the exact target depends on the adhesive supplier's specification and the coating method. Record the reading and compare against the baseline established during commissioning.
Roller inspection
Check the anilox roller for scoring, chipping, or cell wear. A worn anilox delivers uneven coating, which shows up as streaks or patchy bond strength in the finished laminate. Doctor blade condition should be checked each shift—a nicked blade leaves longitudinal stripes in the adhesive pattern.
Drying Unit Maintenance: Temperature, Airflow, and Residual Solvent
The drying oven removes solvent from the adhesive layer before lamination. Incomplete drying is one of the most common causes of bubble formation, poor bond strength, and delamination in finished packaging.
Temperature verification
Oven temperature settings vary by adhesive type, substrate, coating weight, and line speed. Common operating ranges for solvent-based dry lamination ovens fall between 80°C and 150°C across multiple zones, but the appropriate setpoint must be confirmed with the adhesive supplier. Over-drying can carbonize the adhesive surface and destroy its bonding ability; under-drying leaves residual solvent that causes bubbles and weak bonds.
During production, compare the touchscreen temperature reading against a calibrated external thermometer at each zone. A deviation of more than a few degrees indicates a thermocouple or controller issue that should be corrected before continuing.
Airflow and exhaust
Proper airflow removes evaporated solvent from the oven and prevents solvent saturation that would slow drying. Check the exhaust fan operation before starting the heating system. Many dry laminating machines have an interlock that prevents heating if the exhaust fan is not running—never bypass this safety feature. Inspect the air filter and ducting monthly for adhesive buildup or blockage.
Residual solvent monitoring
Residual solvent in the finished laminate is both a quality and a food-safety concern. If you observe solvent odor when unrolling finished laminate, or if bubbles form within hours after lamination, the drying parameters need adjustment. Increase oven temperature within the adhesive's tolerance range, reduce line speed to extend dwell time, or reduce coating weight.
Pressing Unit Maintenance: Nip Pressure, Roller Condition, and Temperature
The pressing unit bonds the two substrates under heat and pressure. Its maintenance focuses on uniform pressure distribution, roller surface integrity, and thermal consistency.
Nip pressure balance
Uneven nip pressure is a leading cause of wrinkles, tunneling, and inconsistent bond strength. Check pressure gauge readings at both ends of the pressing roller weekly. If the readings differ significantly, inspect the pneumatic or hydraulic cylinders and the roller mounting for wear or misalignment. The correct pressure varies by substrate combination and adhesive type—confirm with the machine manufacturer or the adhesive supplier's technical data sheet.
Roller surface condition
The pressing roller surface should be smooth and free of adhesive buildup, scratches, or flat spots. Clean the roller surface with a soft cloth and solvent after each shift while the roller is still warm but not hot. Never use abrasive pads on a coated or chrome-plated pressing roller. If the surface shows permanent damage, the roller may need regrinding or replacement.
Pressing temperature control
The pressing roller temperature must be high enough to activate the adhesive but not so high that it distorts the substrate or causes the adhesive to degrade. On many dry laminating machines, the pressing roller operates in a range that complements the drying oven temperature profile. Verify the roller surface temperature with a contact thermometer during each production run.
Roller engagement and disengagement
During extended shutdowns, disengage the pressing roller from the counter roller to prevent flat spots from developing under sustained pressure. Follow the manufacturer's procedure for releasing pressure before stopping the machine.
Maintenance Schedule Comparison Table
| Unit | Daily Tasks | Weekly Tasks | Monthly / Periodic Tasks |
|---|---|---|---|
| Coating Unit | Flush adhesive system with solvent; clean doctor blade; wipe anilox roller | Check viscosity with Zahn cup; inspect roller surface for wear | Deep-clean anilox cells; inspect doctor blade holder alignment; check pump diaphragm |
| Drying Unit | Verify zone temperatures against controller; check exhaust fan operation | Inspect air filter and ducting for buildup; check thermocouple response | Clean heat chambers when cool; inspect heating elements; verify airflow balance |
| Pressing Unit | Wipe roller surface; check pressure gauges at both ends | Inspect roller surface for scratches or flat spots; verify temperature uniformity | Check cylinder seals; inspect mounting bearings; confirm nip pressure balance across width |
Troubleshooting Reference Table
| Symptom | Likely Unit | Possible Cause | First Check |
|---|---|---|---|
| Bubbles in laminate | Drying | Incomplete solvent removal | Oven temperature and line speed; adhesive viscosity |
| Delamination or weak bond | Coating / Pressing | Insufficient coating weight; low nip pressure | Anilox roller condition; pressure gauge readings |
| Wrinkles or tunneling | Pressing | Uneven nip pressure; roller surface damage | Pressure balance at both ends; roller surface condition |
| Longitudinal streaks | Coating | Damaged doctor blade; worn anilox cells | Doctor blade edge; anilox cell depth |
| Solvent odor in finished roll | Drying | Under-drying; exhaust blockage | Oven temperature profile; exhaust airflow |
| Adhesive buildup on rollers | Coating | Incomplete daily cleaning; incorrect solvent | Cleaning procedure; solvent compatibility |
Practical Maintenance Checklist
- Flush adhesive circulation system with clean solvent after every shift
- Clean doctor blade and anilox roller with appropriate solvent and tools
- Record adhesive viscosity at start of each shift
- Verify all oven zone temperatures against external reference
- Confirm exhaust fan operation before starting heating system
- Check nip pressure at both ends of pressing roller weekly
- Inspect pressing roller surface for scratches, buildup, or flat spots
- Disengage pressing roller during extended shutdowns
- Log all maintenance actions and parameter deviations for trend analysis
FAQ
Q: How often should I clean the anilox roller on a dry laminator?
A: Daily cleaning after each production shift is recommended. Adhesive residue that dries inside anilox cells is significantly harder to remove and may require deep cleaning methods that risk cell damage. If production runs continuously across multiple shifts, clean at every shift change.
Q: What causes bubbles in dry laminated film even when the oven temperature seems correct?
A: Bubbles can result from several factors beyond oven temperature: insufficient airflow in the drying zone, excessive coating weight that exceeds the drying capacity at current line speed, high adhesive viscosity that traps solvent, or moisture absorbed by the substrate before coating. Check coating weight and airflow before assuming the oven is the sole cause.
Q: How do I know if my laminating nip pressure is too high or too low?
A: Too low pressure causes weak bonds and tunneling; too high pressure causes wrinkles and may damage the substrate. Check pressure gauge readings at both ends of the pressing roller—they should match. If both are within the recommended range but bond quality is inconsistent, inspect the roller surface and mounting for wear.
Q: What is the correct adhesive viscosity for dry lamination?
A: The correct viscosity depends on the adhesive type, coating method, and substrate. For solvent-based adhesives applied via gravure or anilox systems, a Zahn cup No. 3 reading of 10–20 seconds at 25°C is commonly referenced, but you should follow the adhesive supplier's technical data sheet for your specific product.
Q: Should I leave the pressing roller engaged when the machine is stopped overnight?
A: No. Disengage the pressing roller from the counter roller during extended shutdowns to prevent flat spots and permanent deformation from sustained pressure. Follow the manufacturer's specific disengagement procedure.
Q: How can I tell if the drying oven needs cleaning?
A: Signs include uneven temperature readings across zones, visible adhesive residue or discoloration on oven interior surfaces, increased solvent odor in the finished laminate, and longer drying times for the same adhesive and coating weight. Clean heat chambers only when the oven is completely cool, using a soft pad and appropriate cleaning solution.
Conclusion
Effective dry laminator maintenance comes down to three disciplines: clean the coating unit before adhesive cures, verify drying parameters against the adhesive specification rather than assuming the oven is working, and check nip pressure balance before wrinkles or bond failures appear.
The most common maintenance mistakes are skipping the end-of-shift solvent flush when production runs late, adjusting oven temperature without checking airflow, and ignoring small pressure differentials at the pressing roller until they cause visible defects. Any time you change adhesive type, substrate combination, or line speed, re-verify all three units against the adhesive supplier's technical data.
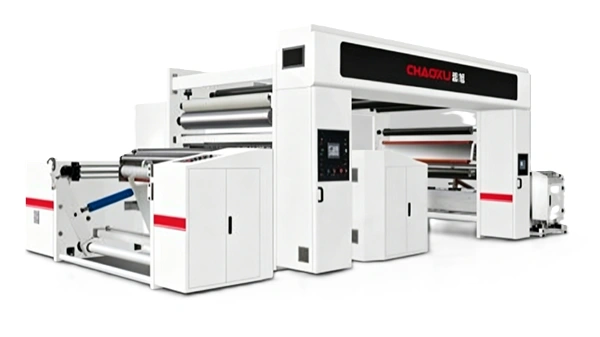
To review the machine configurations and unit specifications that support these maintenance routines, explore the dry laminating machine series and compare the high-speed dry laminating machine specifications for your production requirements. If your maintenance questions relate to tension control or substrate handling across the full line, the web tension control guide covers the upstream factors that affect lamination quality.